The Garmin Edge Explore* is a bicycle GPS navigator specifically for touring cyclists. The bicycle GPS Navi has a particularly attractive price and simple operation. It also offers exactly the features that most recreational cyclists need: Full navigation on a clear color touchscreen, smartphone notifications (can be turned off), customizable data fields. The bike GPS navigator is even expandable with Connect IQ apps: This makes it fully compatible with sports portals like komoot.
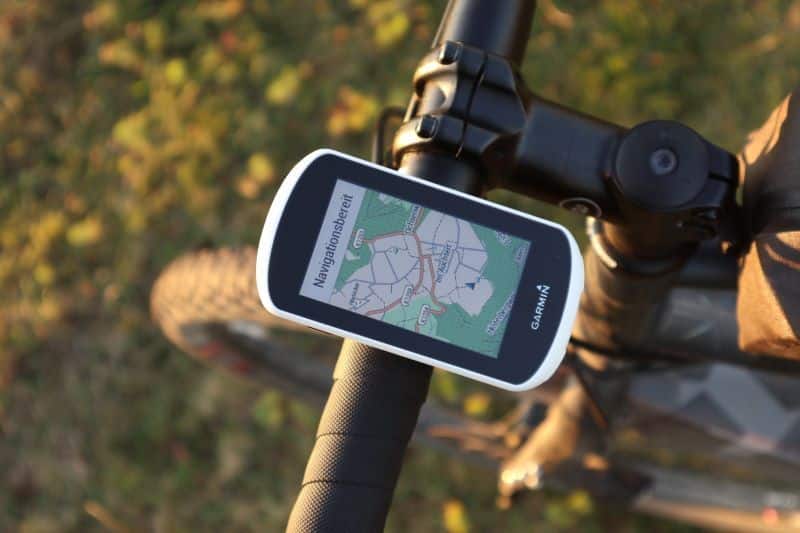
Find out everything you want to know about the Garmin Edge Explore in this review.
You’re in a hurry? Click here to go directly to the Garmin Edge Explore
- Einfache Bedienung: Der hochauflösende 3 Zoll (7,6 cm) Farb-Touchscreen des Edge Explore lässt sich dank einfacher Menüführung mühelos bedienen - auch mit Handschuhen und bei Regen; Das Display ist zudem bei direkter Sonneneinstrahlung sehr gut ablesbar
- Ideale Navigation: Auf der vorinstallierten Garmin Europa Fahrradkarte können Sie sich dank umfangreicher Navigation bequem an Ihr Ziel leiten lassen; Fahren Sie auf den beliebtesten Strecken und folgen Sie vorgeschlagenen Rundkursen; Ideal im Urlaub
- Detaillierte Daten: Dank GPS werden Detaillierte Daten wie Distanz, Geschwindigkeit oder das Höhenprofil aufgezeichnet; Diese können Sie nach Ihrer Tour auf Garmin Connect (PC/App) ganz bequem auswerten und sich ansehen, wohin Sie Ihre Tour geführt hat
* Werbung - Aktualisierung am 2024-04-22, Preis kann gestiegen sein, Als Amazon-Partner verdiene ich an qualifizierten Verkäufen, Bild:Amazon
Garmin Edge Explore Highlights
What are the big features of the Garmin Edge Explore?
✅ Full navigation: Includes route recalculation if you get lost.
✅ Large color touchscreen with 240 pixels * 400 pixels resolution: And it works really well – read about my experience below.
✅ 16 GB internal memory: With preloaded, detailed maps from the region where you purchased the Garmin Edge Explore.
✅ Simple operation and fast response
✅ Free map updates
✅ Favorable price
…and many other functions. I present them all to you in detail in this Garmin Edge Explore review.
Garmin Edge Explore bei Amazon kaufen*
The Garmin Edge Explore offers really a lot. Considering the low price, the GPS bike computer looks even more attractive. You could say that we are dealing with the little brother of the high-end GPS bike navigator Garmin Edge 1030!
But which functions have been eliminated? For the most part features for performance-oriented cyclists. For example, Strava Live segments are not supported. The good news is that you can still plan routes with Strava and upload completed trips to Strava. It also does not support structured training and tethering of power meters. Komoot is also fully supported via the Connect IQ apps.
On the whole, though, that was it. Almost all other functions mastered by the Garmin Edge Explore. A few functions are still missing. These will surely be missed by few. Since they are details, I’ll explain them to you in detail further down in this Garmin Edge Explore review.
Garmin Edge Explore Unboxing & Scope of delivery
Included in the scope of delivery of the bicycle GPS Navi are:
- Garmin Edge Explore bike navigator
- Two stem/handlebar mounts and rubber bands in different lengths – great for using the bike navi on multiple bikes.
- A loop to secure the GPS bike computer from falling down
- Micro USB charging cable
- Documentation required by law
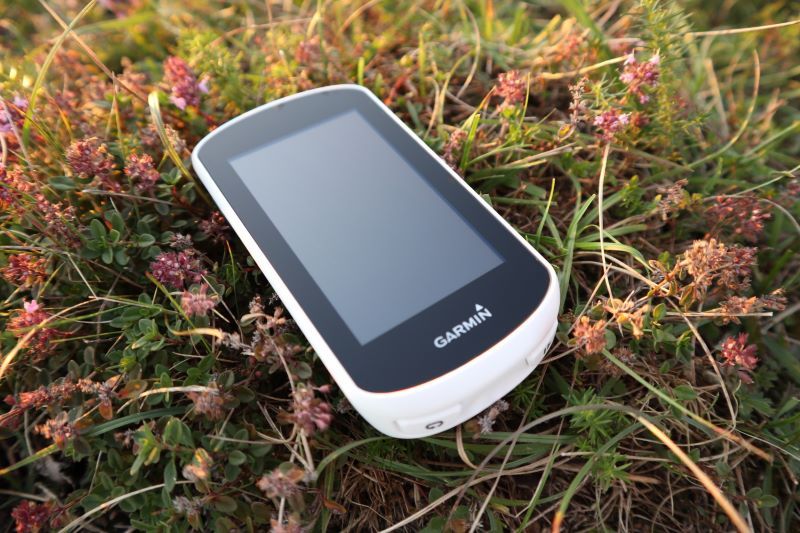
Printed operating instructions are not included in the scope of delivery. I’m sure you’re having an exclusively good Garmin Edge Explore experience without the manual. Because: Fortunately, the operation of the Explore is logically structured, so you probably don’t need the manual. If necessary, the manual can be downloaded from Garmin.
Hardware and memory of the Garmin Edge Explore
At first glance, the Garmin Edge Explore is very similar to the top-of-the-line Garmin Edge 1030. Of course, there are differences between the two bike GPS navigation software. But the hardware also differs:
- The Edge Explore is about 1 centimeter shorter – accordingly, the display is also slightly smaller in height
- The case is also slightly narrower, though this difference is barely noticeable
- As a result, the display is also smaller than in the Edge 1030
For the target group “touring cyclists” the chosen size of the housing including display seems ideal: The Garmin Edge Explore is slightly smaller than the Garmin flagship Edge 1030. With dimensions of 105 x 55 x 22 millimeters, it is nevertheless significantly larger than the Garmin Edge 530 and 830 devices.
The Garmin Edge Explore weighs 116 grams.
16 GB of memory are permanently installed in the Garmin Edge Explore. On the bike GPS Navi are already detailed maps preinstalled. The installed region is the region where the Garmin Edge Explore was purchased. On my copy, according to Windows Explorer, there was still 4.7 GB of free space.
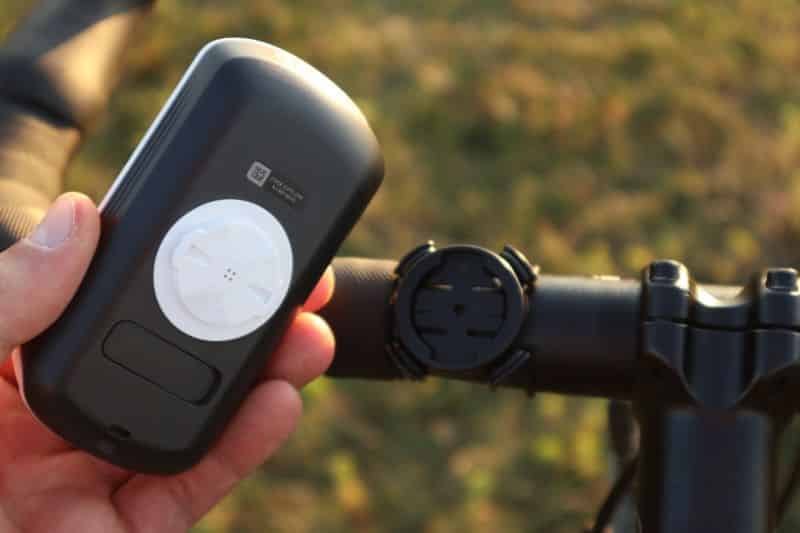
So enough space for upcoming map updates and lots of routes, waypoints and recorded tours. Unfortunately, there is no possibility to expand the storage via microSD.
How have my Garmin Edge Explore experiences been when it comes to fast stallite reception? The US satellite system GPS is used to determine the current position. Other technologies such as GLOSNASS are not used. In the bike navi test this hardly makes a difference. In practice the satellite signal is found quickly. Even in difficult situations, such as under a canopy or in the city with many high houses, the GPS bike computer determines the position reliably.
However, some sensors have been skimped on – so following sensors are not present:
- Barometer for altitude measurement
- electronic compass and temperature sensor
- Unfortunately, the temperature sensor cannot be coupled either.
The Garmin Edge Explore bike navigator works swiftly and smoothly. This is noticeable when moving through the menus, and even demanding tasks like zooming in on the map work quickly. Such a snappy speed is what I expect from a modern bike GPS nav and the pace is absolutely on point.
Garmin Edge Explore Display
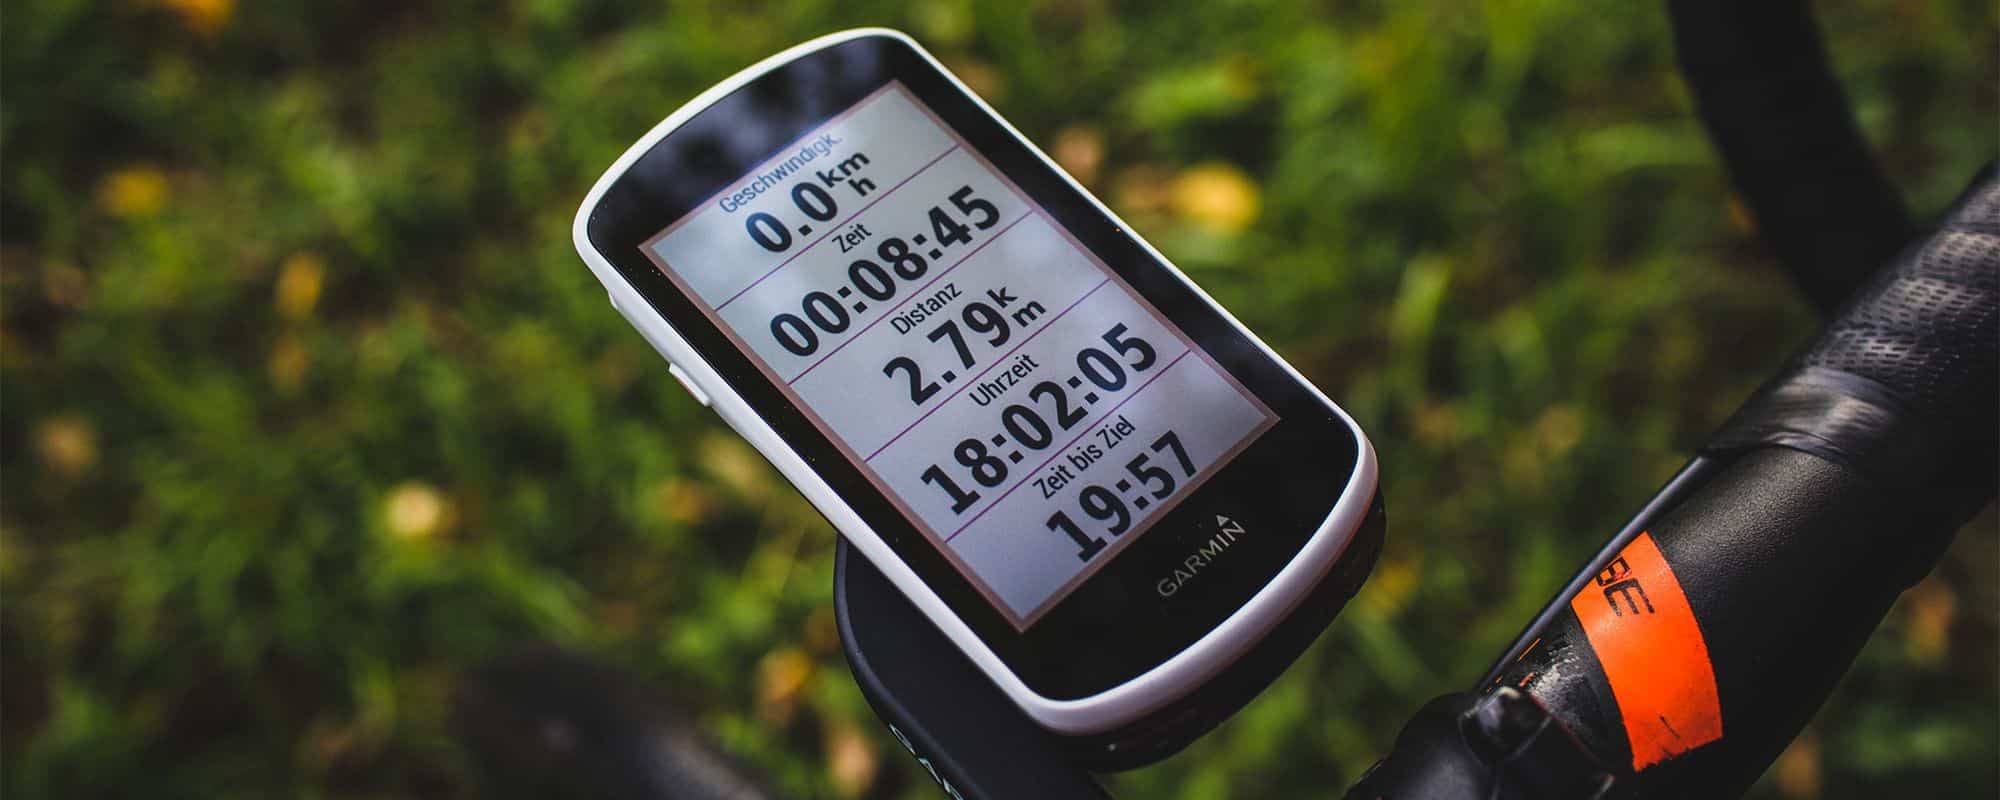
The display is 3 Toll in size with a resolution of 240 x 400 pixels. The colour touch screen is easy to read. This also applies in difficult lighting conditions such as in the forest under a canopy of leaves or in bright sunshine.
Thanks to lighting, the Garmin Edge Explore can also be read in the dark. Unfortunately, Garmin has saved the brightness sensor. Thus, the touchscreen brightness has to be adjusted manually. In the bicycle navi test, 50 to 60% brightness is sufficient for most situations. If the brightness is too high, it should be considered that the battery will then run out faster.
How is the operation of the touch screen? Good news: In all positions the touchscreen responds precisely and super fast! Especially in the map view! The speed has taken a huge step forward and is on par with the top model Garmin Edge 1030. Almost already on smartphone level 🙂
Rain and wetness is often a challenge for touchscreens. Once the screen is wet, the display goes haywire. So often behave smartphones and other GPS bike navigation. Garmin has done a great job here and even with large raindrops on the display, the Garmin Edge Explore can be operated wonderfully.
Battery life of the Garmin Edge Explore
Garmin specifies the battery life with 12 hours. In the practice bike navi test, between 9 and 11 hours of navigation are realistic. I get these values with a display brightness of 60% and paired sensors as well as sometimes connected smartphone.

So a complete day trip could be scarce and I recommend in that case to take a powerbank with you.
There are other ways to increase battery life:
- Without a backlight and connected sensors, the Garmin Edge Explore bike navigator lasts nearly 13 hours.
- Energy saving mode: In this mode, the display only switches on when touched or when a Navi hint is given. Garmin speaks here of a doubling of the runtime. More than 20 hours of battery life are realistic in this mode. If you already know the route and just want to record your trip, this mode is ideal.
The battery of the Garmin Edge Explore is permanently installed and can be charged via micro USB. The socket is accessible via a rubber cover at the rear. This design makes the device nice compact and also IPX7 weather resistant.
On the other hand, the case is unfortunately welded tight and cannot be opened. Thus, a battery swap is also not provided. If the battery weakens after a few years, the bicycle GPS navigator can unfortunately only be disposed of.
Other Garmin navigation devices like the Edge 1030 are compatible with the Garmin external battery pack. Unfortunately, the Edge Explore lacks the contacts for this accessory, making it incompatible with the battery pack.
Charging the battery is also possible during operation and with the navigation switched on. So ideal for operation via powerbank or charging via the hub dynamo? The USB socket is unfortunately rather clumsily attached to the underside of the case. If the bike GPS Navi is mounted on the stem, you can not get to the charging socket. To me, the danger also seems quite large that the USB cable slips out while driving down, but that has not yet happened to me in the bike navi test.
Sensors and connections on the Garmin Edge Explore
Sensors and devices can be connected to the Garmin Edge Explore with ANT+ and Bluetooth LE – so there are two wireless interfaces available.
The menu for adding sensors and devices displays these types:
- Edge remote control
- E-bike
- Heart rate
- Cadence
- Light
- Speed/Cadence
- Speed
- Radar
- Garmin VIRB Action Camera
The Garmin Edge Explore bike navigator cannot be paired with the following sensors
- Power meter
- electronic circuits
- Head-Up Display (HUD) Varia Vision
Several sensors can also be connected. If a sensor is connected, it can be activated and deactivated. If several sensors of the same type are used, it is recommended to change the name of the sensors. With this, you then also simply keep track in the menu.
During my Garmin Edge Explore test, I made heavy use of Wahoo’s Bluetooth speed and cadence sensors. The interaction with the sensors always worked reliably and flawlessly: connecting, deactivating and activating the sensors several times and, of course, transmitting the measured values.
Smartphone Connection and Connect IQ Apps
You can connect your smartphone to the Garmin Edge Explore via Bluetooth. The connection between bike navigator and smartphone is quickly established and reliably maintained. Call and SMS notifications are possible and can also be turned off if desired.
Of course, you don’t necessarily need a smartphone to navigate with the Garmin Edge Explore 😉
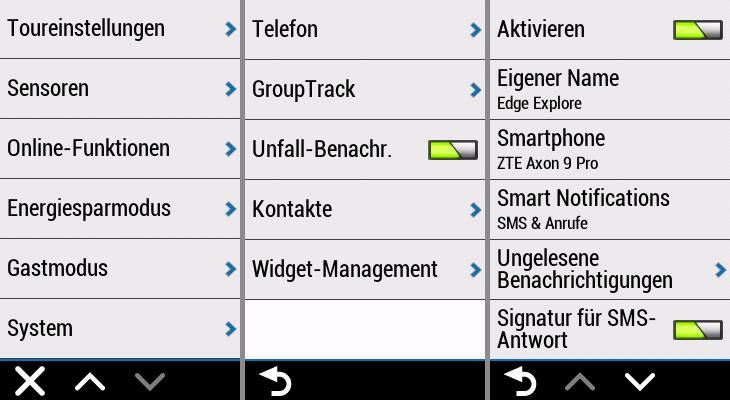
You can download the Garmin Connect app for free from Google Play and the Apple App Store.
Also via the Garmin Connect app, you can then install Garmin Connect IQ apps on your Edge Explore. Particularly exciting are the komoot and Strava apps. Your completed activities can be automatically uploaded to komoot and Strava with the Connect IQ apps.
You can also upload your routes created with komoot to Edge Explore. The whole thing works wirelessly and offline navigation is of course also possible.
Reading tip: The complete setup of the komoot Connect IQ app with your Garmin sat nav is explained in the comprehensive komoot guide.

Garmin Edge Explore operation and settings – Bike navi test
Great importance was clearly placed on ease of use, that I noticed right at the beginning of the bike navigation test. Thus, the Garmin Edge Explore is easily accessible and the operation is very logically structured.
The Garmin Edge Explore is operated via the touchscreen and three buttons:
- Touch screen: The majority of the inputs are made by touch via the screen
- Power button on the left of the housing: To switch the device on and off and to open and close the menu.
- Two buttons at the bottom of the housing: Round button and Start-Stop button
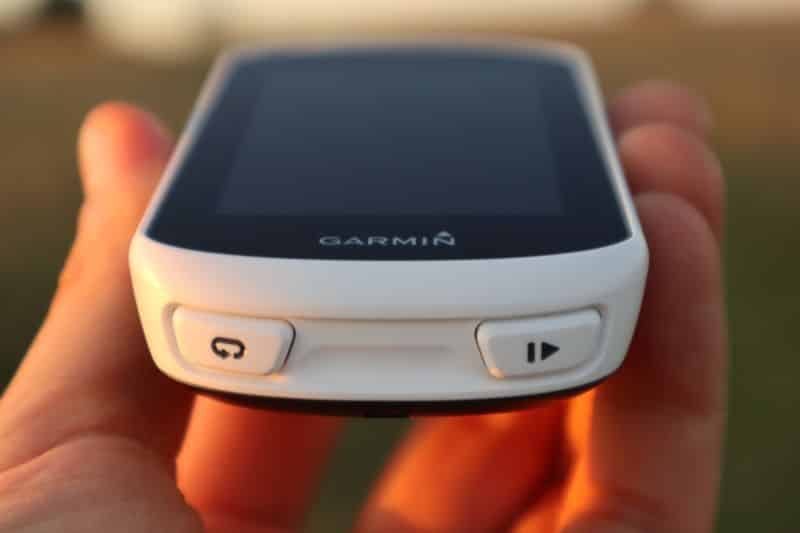
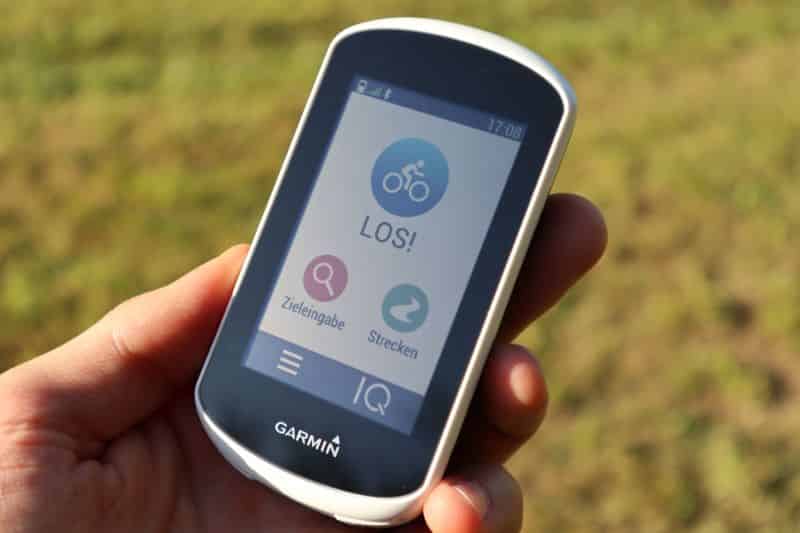
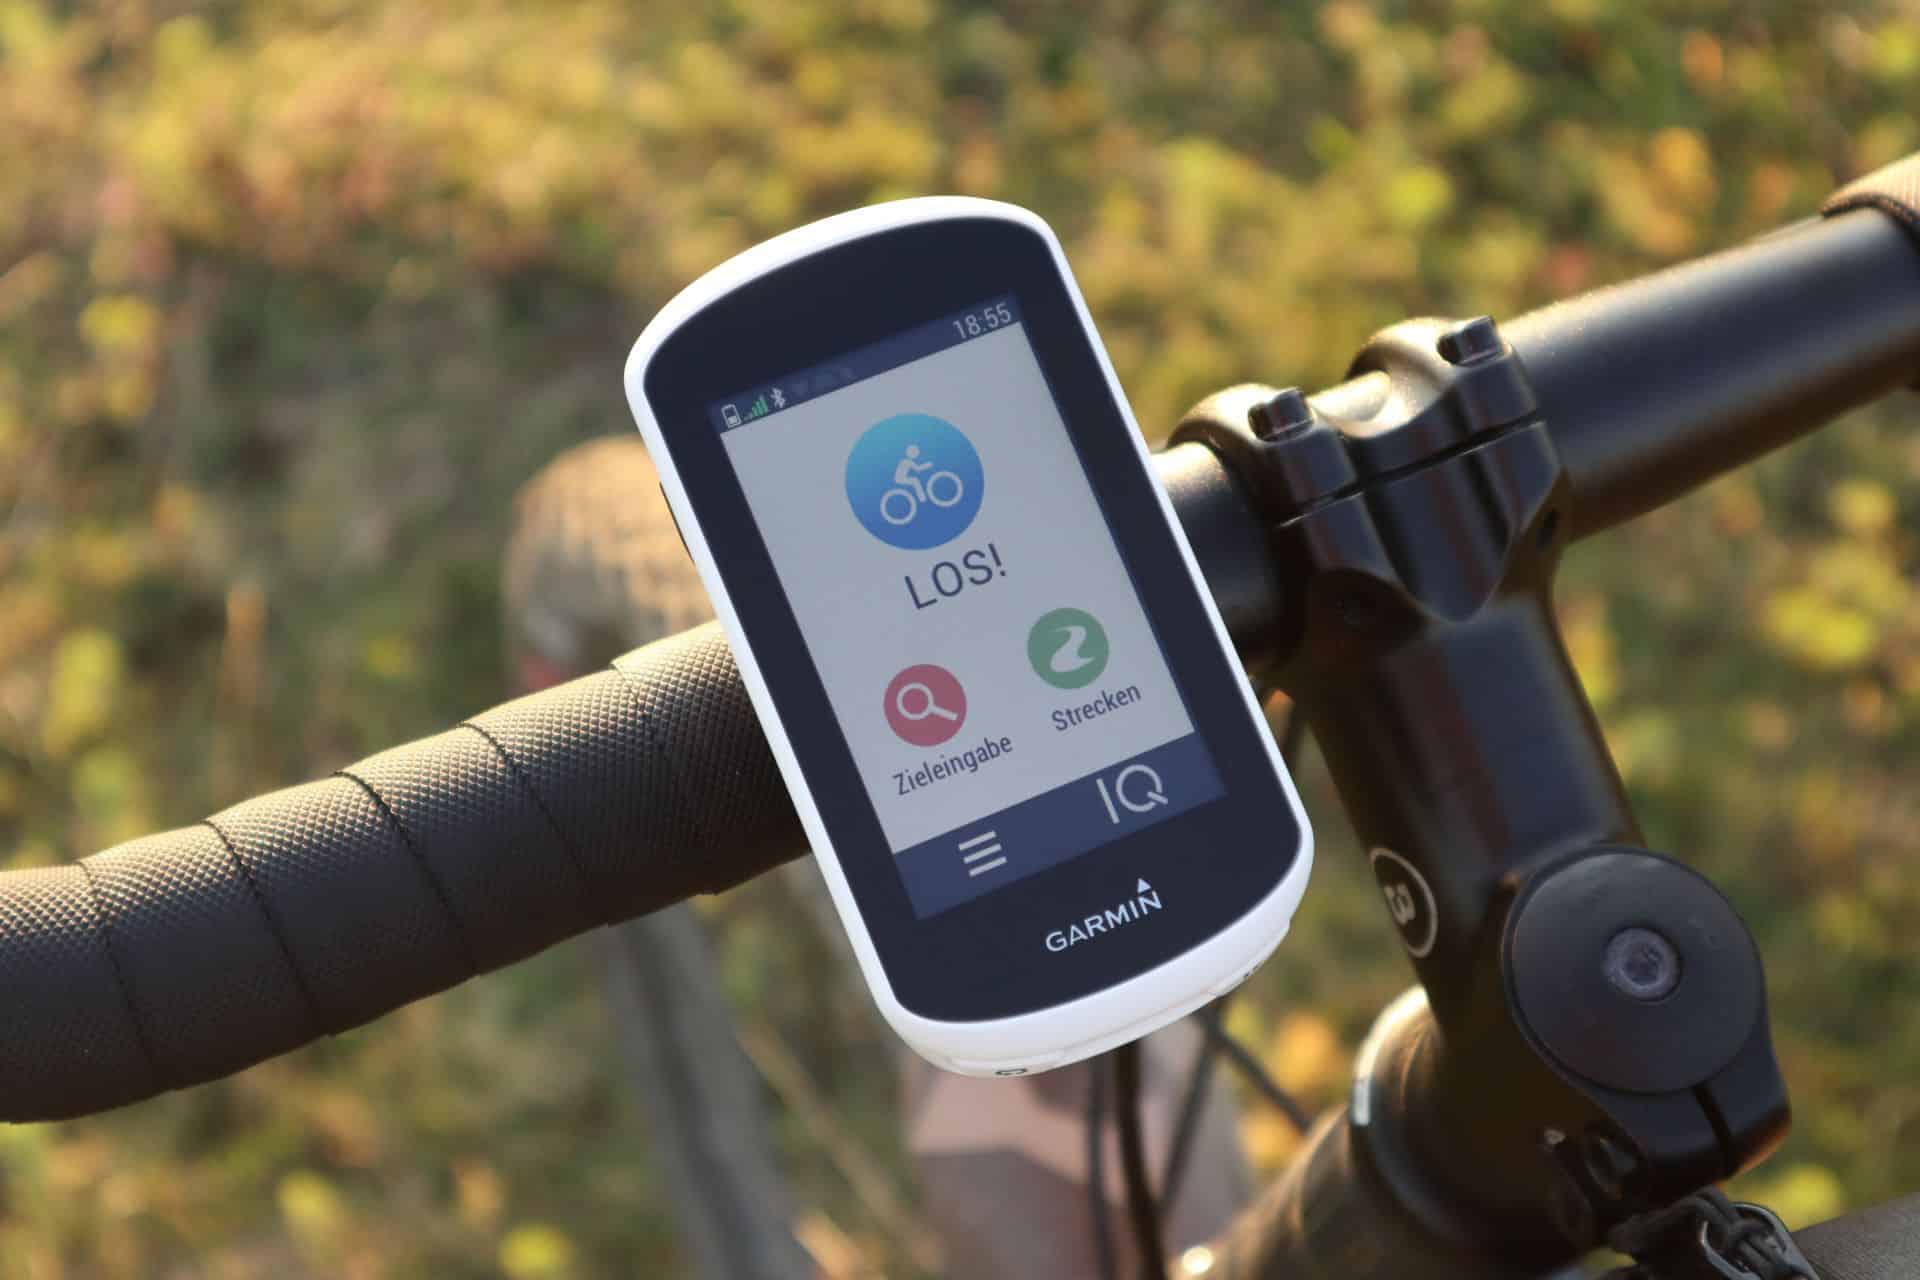
The start page is very clearly arranged. Here I have exclusively good Garmin Edge Explore experience. From here, the five important functions can be accessed directly:
- GO! This big button takes you directly to the activity recording – one push of a button starts the recording. The map and the altitude profile are then displayed here. You also have access to the compass and data pages.
- Destination input and route: These are the buttons for the two navigation functions. The Destination Input menu lets you select things like POIs, coordinates, an address, created favorites, and recently used destinations as navigation destinations. Or simply tap on the map and let it navigate you there. The Route menu allows you to select saved routes. There are also other functions such as route planner, RoundTrip routing or creating routes from a previously ridden tour.
- Hamburger icon and IQ icon in the menu bar at the bottom: The hamburger icon (three dashes) takes you to the settings, the activity log, you can manage sensors, and so on. The IQ icon is used to access Connect IQ Apps.

Swiping the screen from top to bottom opens the DeepL access menu. Useful functions can be quickly set here. These include display brightness, phone settings, direct access to settings, sensor menu. From here you can swipe left or right to get to the widgets menu. As I said: The operation is really easy and I found my way at the beginning of the bike navi test immediately.
During a tour you can change the data pages by relaxed swiping to the left or right. For example, you can switch between the map view and the altitude profile. The touchscreen responds accurately to inputs and the software is nimble. This means that operation is also possible while driving. An automatic page change can also be set.
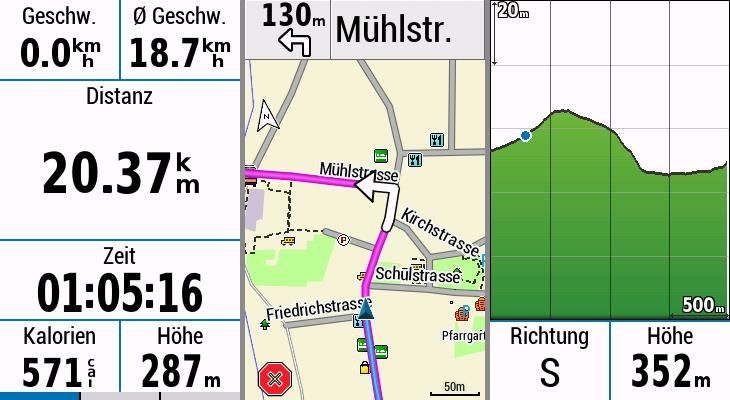
This is how you get back to the main menu: Tap the display, a menu opens, then tap the Home symbol. As I said, the operation is simple and the menus are logically structured. After a short learning phase, the operation works really well. Good Garmin Edge Explore experience so 🙂

Picture above: Back to home page Menu
Due to the ease of use, however, there are also a few drawbacks to the Garmin Edge Explore bike navigator: There are no activity profiles. Unfortunately, individual setting profiles cannot be saved. Conceivable would otherwise be, for example, a profile with settings for road bike and a separate profile with settings for mountain bike.
The training functions are also limited. The following functions are possible: display of map, altitude profile, compass, group track and two data pages. For this, up to ten data fields are displayed per data page – this is more than sufficient. As described above, heart rate and cadence sensors can be connected to the Garmin Edge Explore. The determined values can then be displayed as a data field. Unfortunately, graphical values, like in the Garmin top model 1030, cannot be displayed. There may be a solution here through a Garmin Connect IQ app.
Considering the price and the target group of touring and leisure cyclists, these are features that can be done without. As I said, features that are probably needed by most cyclists are present and well implemented.
Bike Navigation with Garmin Edge Explore
For most cyclists, navigation is definitely the most important feature of the Garmin Edge Explore experience. In my Garmin Edge Explore test, I have therefore tested the navigation function in particular detail. Overall, it can be said that navigation, especially with saved routes, works best. Thanks to Connect IQ apps, planned routes from sports portals such as komoot and Strava can also be wirelessly transferred to the bike GPS navigator.
Pre-installed are maps from the region in which the Garmin Edge Explore is purchased. In our case, a complete map of Europe is included. Garmin typically updates the map material twice a year free of charge.
The navigation can be started easily from the start page: Tapping Destination entry or Route opens the corresponding menus and provides you with further options.
In the menuDestination input you can select Search by address. Just like you know it from a car navigation system or Google Maps. As soon as the address is unique, you will get the result in a list.
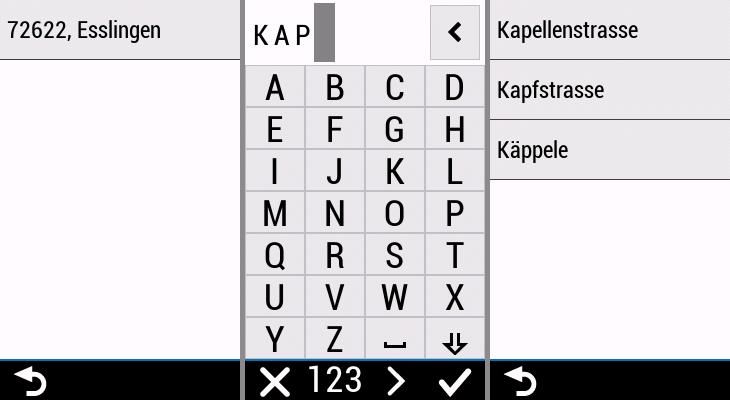
Also in the menu Destination Input is the Search option. There you can select POIs as destinations for navigation. However, the quality of the suggestions varies from very good to barely usable. The only thing left to do here is to try it out.
Other items in the target input menu:
- Back to start: Navigates back to the starting point (bike navigation to start).
- Search map: Tap any point on the map to navigate there.
- Favourites: Destinations can be saved here. Operation that takes some getting used to.
- Recently found: History of recently navigated destinations.
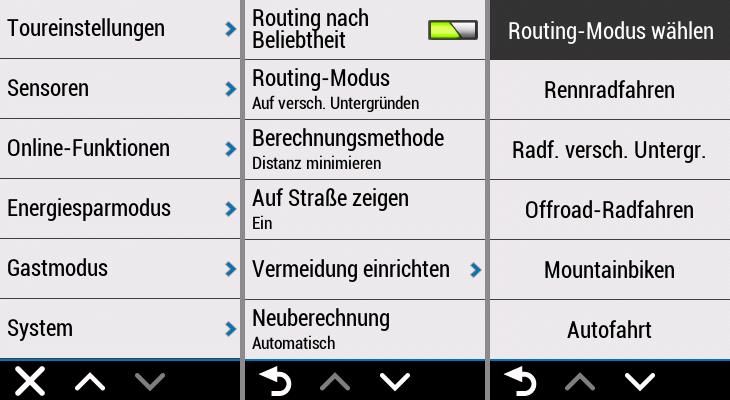
In the Tour Settings I tried different routing modes during my Garmin Edge Explore test (the menu item is called Routing Mode). The options offered there will adapt the route to your own driving behaviour. The route can be optimized for touring cyclists, gravel bikers, road cyclists and mountain bikers.
There is also an auto option, but I have not tested it. With my Gravel Bike the routing mode “Offroad Cycling” and “Radf. various Below.” exciting routes created. In most cases, exactly what I wanted.
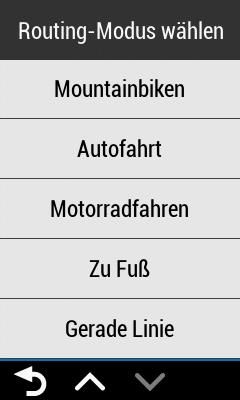
The routing options are really diverse. The Garmin Edge Explore is therefore not only suitable for bicycle navigation. There are also modes for car and motorcycle drivers and for walking (hiking) on board. Extensive experience I have collected in the bike navi test of course only with the bike navigation.
Navigation along a pre-planned route (Track Navigation)
Back to the start page: There you will also find the menu item Route. This allows you to cycle along pre-planned routes.
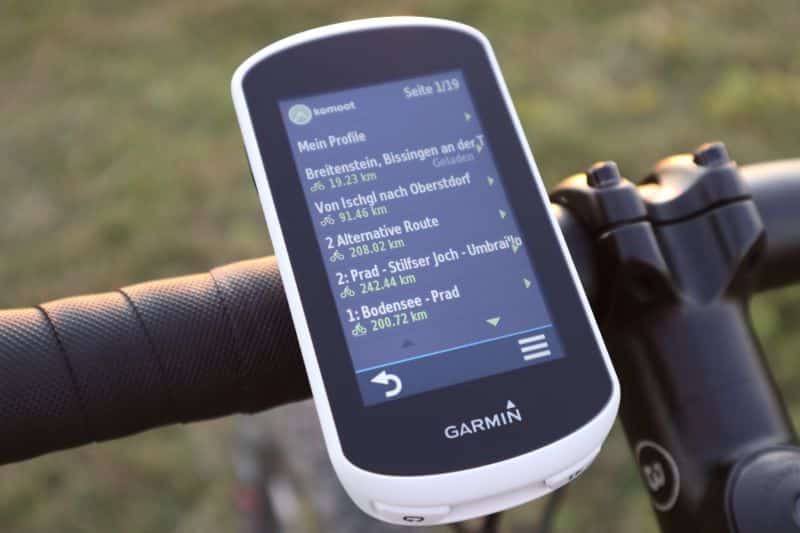
The route is planned in advance using an app like komoot or Strava and then transferred to the GPS bike satnav. Either on the computer or on the smartphone. This is much more comfortable than planning on the device and opens up completely new possibilities.
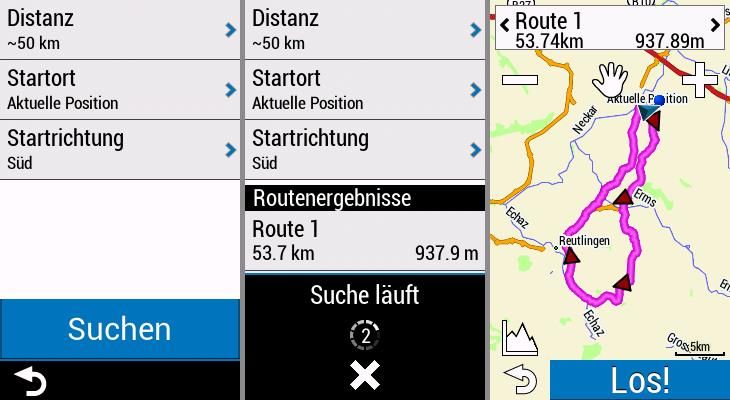
Round Trip Routing – Bike Navigation
How do the routes get onto the Garmin Edge Explore?
The Garmin Edge Explore bike navigator can therefore navigate along pre-planned routes in the Route menu. But before the bike navigation begins, the routes want to be transferred to the GPS bike navigator. What are the options?
There are many ways to do this. I’ll introduce you to all of them and tell you which one is most practical:
Wireless: Via Bluetooth from smartphone or with Garmin Connect IQ Apps
There are several ways to wirelessly load tracks on the Garmin Edge Explore:
- Import via Garmin Connect IQ app from komoot or gimporter.
- Plan your route with the Garmin Connect app and then send it to the GPS bike navigator.
- Import a route into the Garmin Connect app and then send it to Edge Explore.
With USB cable to Garmin Edge Explore (USB mass storage mode)
There are also several options for the cable variant:
- Plan a route yourself. This can be done, for example, with the applications Garmin BaseCamp and GPS Track Editor. Then export the route file as GPX or FIT and copy it to the folder described below.
- Copy a route file manually: Download GPX or FIT file from the Internet and copy it to the “Garmin/NewFiles” folder.
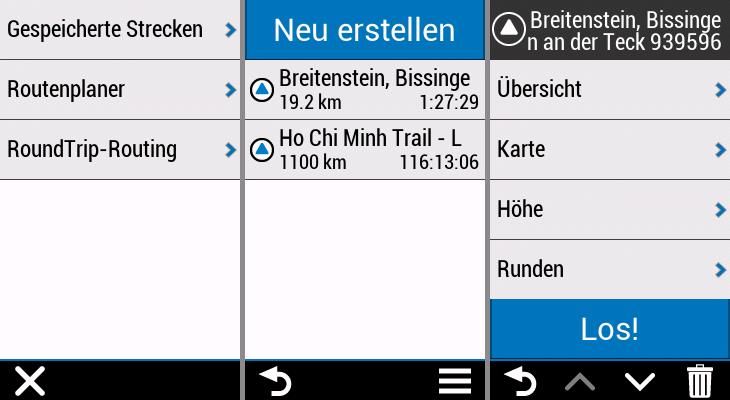
The transferred route can then be easily selected via Saved route. The bike tour can already start!

Insert image with Calculate above
When transferring the routes to the Garmin Edge Explore bike navi leave little to be desired! The many options for route transfer are convenient and I like very much. Thanks to the smartphone connection, complex routes can also be planned on the go and transferred directly to the Garmin Edge Explore. With the Garmin Connect IQ apps komoot and Strava, the market leaders among touring and sports portals are also on board. The easy route transfer thus confirms my good Garmin Edge Explore experience.
Comparison and difference: Current Garmin models


* Werbung - Aktualisierung am 2024-04-22, Preis kann gestiegen sein, Als Amazon-Partner verdiene ich an qualifizierten Verkäufen, Bild:Amazon
Garmin Edge Explore experience and summary
If you value reliable navigation and ease of use, then the Garmin Edge Explore is for you. The bike navi is the ideal companion on a bike tour and navigates safely to the destination. Navigation is at a top level and the GPS sat nav is always easy to read thanks to the excellent touchscreen. The smartphone connection allows convenient and fast transfer of routes to the navigation system. Sports apps like Strava and komoot are also successfully integrated.
Buy Garmin Edge Explore – yes or no?
For a low price, the Garmin Edge Explore is an easy-to-use bike navigation device. The navigation is excellent and the satnav hardly ever suffers from any weaknesses.
- Einfache Bedienung: Der hochauflösende 3 Zoll (7,6 cm) Farb-Touchscreen des Edge Explore lässt sich dank einfacher Menüführung mühelos bedienen - auch mit Handschuhen und bei Regen; Das Display ist zudem bei direkter Sonneneinstrahlung sehr gut ablesbar
- Ideale Navigation: Auf der vorinstallierten Garmin Europa Fahrradkarte können Sie sich dank umfangreicher Navigation bequem an Ihr Ziel leiten lassen; Fahren Sie auf den beliebtesten Strecken und folgen Sie vorgeschlagenen Rundkursen; Ideal im Urlaub
- Detaillierte Daten: Dank GPS werden Detaillierte Daten wie Distanz, Geschwindigkeit oder das Höhenprofil aufgezeichnet; Diese können Sie nach Ihrer Tour auf Garmin Connect (PC/App) ganz bequem auswerten und sich ansehen, wohin Sie Ihre Tour geführt hat
* Werbung - Aktualisierung am 2024-04-22, Preis kann gestiegen sein, Als Amazon-Partner verdiene ich an qualifizierten Verkäufen, Bild:Amazon
Good
✅ Excellent touchscreen: Clearly readable – can also be operated with rege
✅ Logical and simple operation: Even for beginners quickly learnable
✅ Extensive navigation: Bike navigation and numerous other activity profiles
✅ Expandable thanks to Connect IQ Apps: For example with koomot and Strava
✅ Wireless transmission of routes: From smartphone to Edge Explore
✅ Free updates for maps.
✅ both wireless technologies built-in: ANT+ & Bluetooth for sensors
✅ Low price
Bad
❌ Missing brightness sensor
❌ Slow USB connection
❌ Battery life only average (between 9 and 11 hours)
Alternatives to the Garmin Edge Explore bike navigator
TAHUNA TEASI ONE4
The Teasi is also easy to use, but otherwise can only score with the low price. The touchscreen is larger but less legible. This is a disadvantage especially in difficult lighting conditions. I recommend the Garmin Edge in comparison, unless it really comes down to every euro.
- Farbe: Schwarz
- Marke: Teasi
* Werbung - Aktualisierung am 2024-04-22, Preis kann gestiegen sein, Als Amazon-Partner verdiene ich an qualifizierten Verkäufen, Bild:Amazon
To the detailed TAHUNA TEASI ONEA 4 field test (test & experiences)
Garmin Edge 1030
The Garmin flagship brings some improvements. The most obvious is the screen, which has grown in size compared to the Garmin Edge. In addition, the battery lasts longer and the training functions are more extensive. In terms of navigation functions, Edge Explore and Edge 1030 are both on a top level. The biggest drawback of the Edge 1030: The price is almost twice as high.
- Fahrradcomputer mit 3,5 Zoll großem Display, umfassenden Navigationsfunktionen sowie Leistung- und Fahrradsicherheitsfunktionen
- Trendline Popularity Routing zeigt basierend auf Milliarden von Kilometern an Streckendaten von Garmin Connect die besten Straßen- und Geländerouten an
- Vorinstallierte Fahrradkarte für Abbiegehinweise und neue Navigationsalarme
* Werbung - Aktualisierung am 2024-04-22, Preis kann gestiegen sein, Als Amazon-Partner verdiene ich an qualifizierten Verkäufen, Bild:Amazon
To the detailed Garmin Edge 1030 field test (test & experiences)
What do you think of the Garmin Edge Explore? Do you have any questions? Please write me your comment.
The GPS bike computer tested here doesn’t suit you?
- In the extensive Bicycle Navi Test I have all recommendable bicycle Navis clearly in the comparison.
- In the Garmin Edge comparison you will find a complete model overview of all Garmin bike computers and bike navigation devices.
I regularly update both tests. Best check out the articles now.


Thank you for the thoughtful and thorough review!